Your website uses a custom content type called Projects that allows you to easily add new projects to the website.
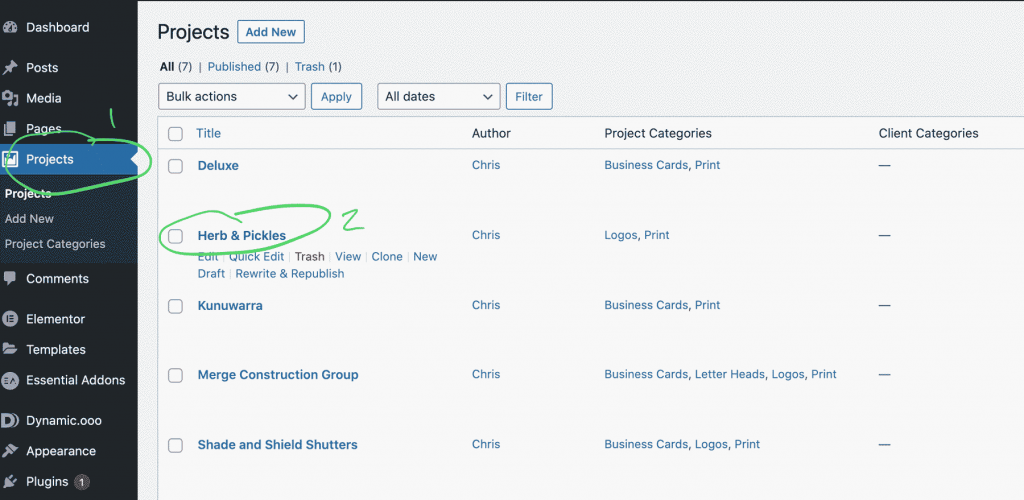
Edit existing Project
- Click Projects in the WordPress Menu
- This will display a list of projects. Simply click on the project title to edit it.
- Make changes as required then click the Update button to save and apply the changes.
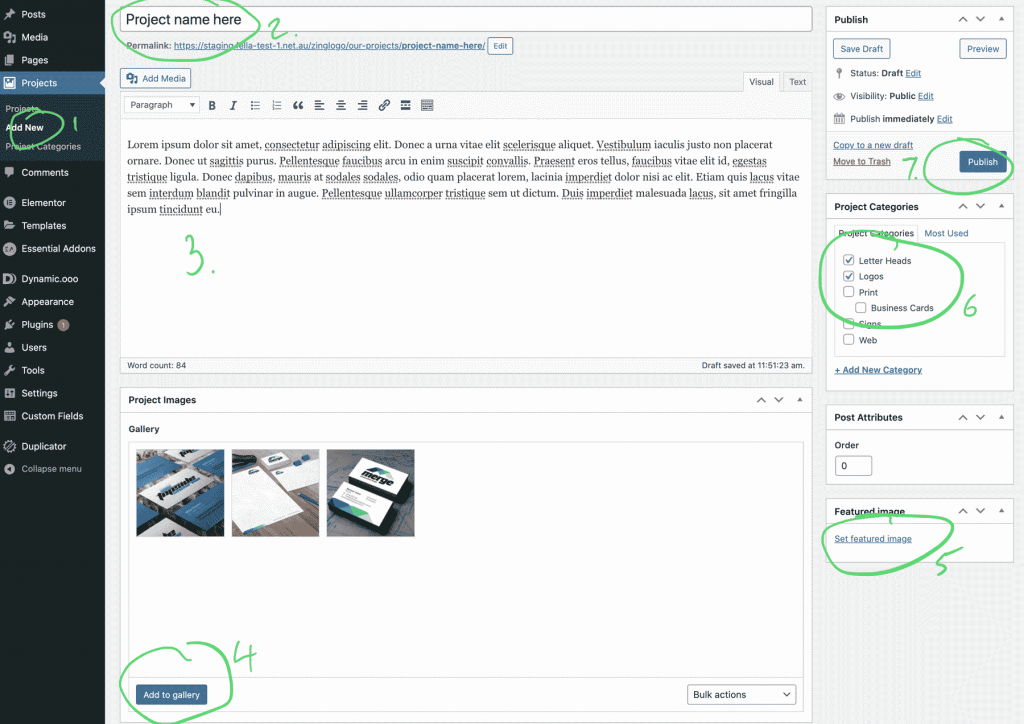
Add new Project
- Go to Projects > Add New in the WordPress menu
- Give the project a title
- Add project description in the text editor
- Add project images by clicking the Add to Gallery button
- Set the feature image
- Set the category. This is imortant as it dictates where the project will display. Projects can be added to multiple categories
- Click the Publish button to save.