Elementor is a page builder plugin that replaces the basic WordPress Block editor with a live frontend editor, so you can create complex layouts visually, and design your website live, without having to switch between the editor and the preview mode. The user interface is extremely friendly, so it only takes a few minutes to get the hang of it.
Your website uses a professional version of the plugin which includes an extensive library of widgets that you can simply drag and drop onto your page to display different content.
Create a new page
- On the top left side of the WordPress dashboard, click Pages > Add New
- Click Edit with Elementor to enter Elementor Website Builder
- Now refer to the steps below or watch Elementors video on how to build a page.
Working In Elementor
Containers, Columns & Widgets
Elementor uses three main building blocks: Containers, Columns, and Widgets.
- Containers are the largest building blocks, and inside them are groups of Columns.
- Columns sit inside of Sections and are used to house the Widgets.
- Widgets are placed inside of Columns. There are an extensive library of Widgets and they are used to display different content types. View Widgets on Elementor.
You control the Section, Column, and Widgets with their handle.

You can choose to show or hide the editing handles by clicking the hamburger menu to open Elementor’s Style & Settings Configuration menu. Click the Preferences tab and slide the switch to Yes to show Editing Handles when hovering over the element’s edit button or No to hide the handles on hover.

Edit Container, Column or Widget
To edit the Container, Column, or Widget, Right Click their handle.

Note: Learn more about Right Click
Container
- Click the
 icon to create a Container, or click the icon to use a pre-designed Page or Block from our library
 - Set your Column structure
- Right click to Edit, Duplicate, Copy, Delete etc.
Use the Section handle
to: add a section, drag a section, or delete.

 to: add a section, drag a section, or delete.
What are Widgets
Widgets are content block that display you content in diffrent manner. There are many different widgets and each widget in Elementor offers advanced design customization allowing you display content how you want. Some of the most used Widgets include image holders, text blocks, headings, video, image galleries and buttons. Your website includes both basic and pro widgets. You can view a complete list of available widgets and how they work on Elementor website.
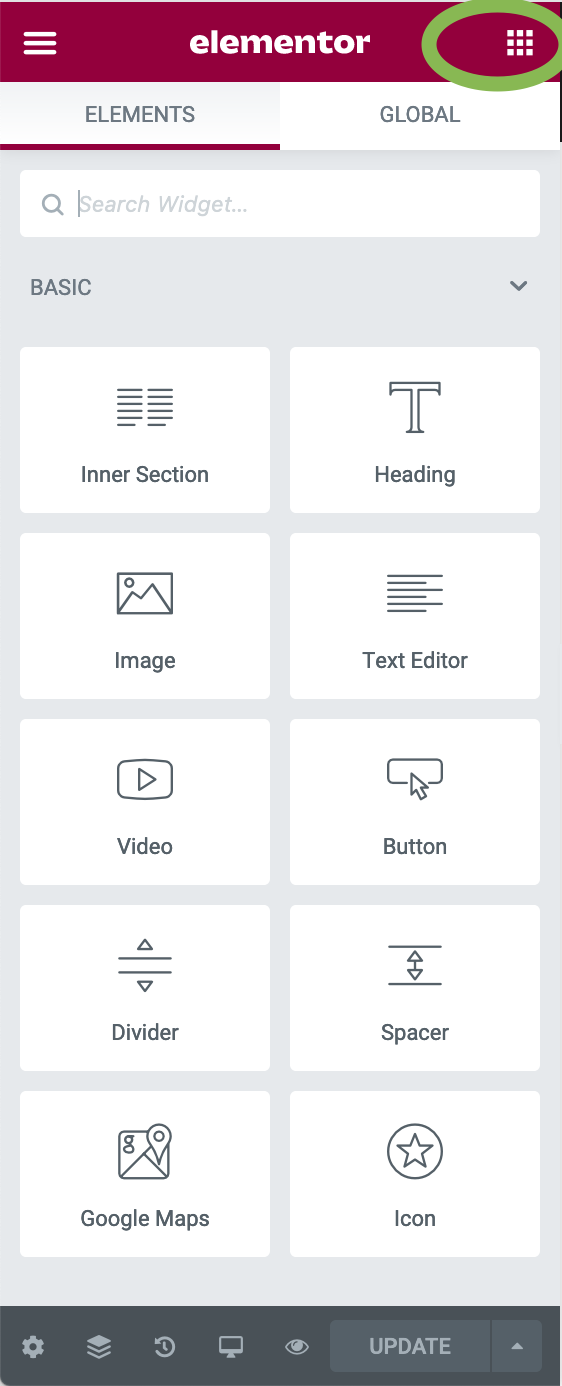
View Widget Panel
To view the widget panel click the widget icon![]() in the Elementor panel on the left hand side of the page editor. Simply scroll to view all available Widgets or use the search box to filter the widgets. For example if you wanted to add an image or image gallery then start typing image and you will see all Widgets that display images.
in the Elementor panel on the left hand side of the page editor. Simply scroll to view all available Widgets or use the search box to filter the widgets. For example if you wanted to add an image or image gallery then start typing image and you will see all Widgets that display images.
Add a Widget
To add a Widget simply click and drag it from the Widget panel onto the page where you would like it to be positioned. If you need to reposition a widget simply click and drag on the pencil icon that appears when you hover over a widget block.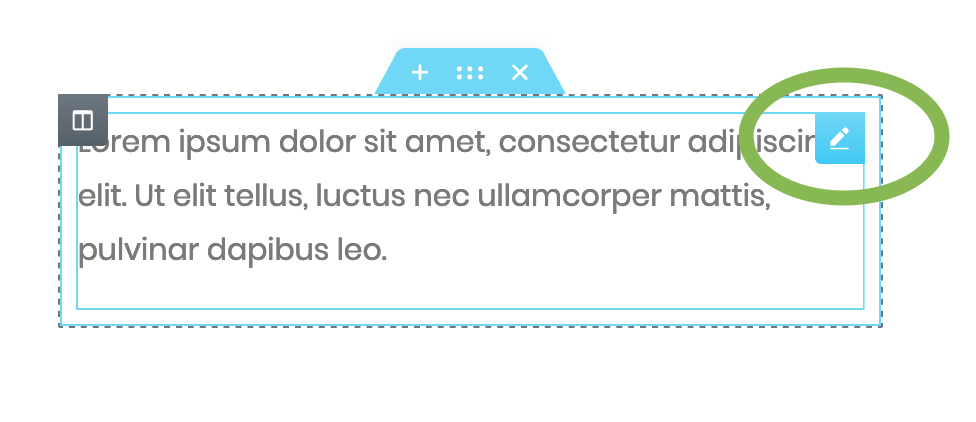
Widget Options
Once you have added the widget to your page you can select it by simply clicking on the widget(or the content block that it displays) within the page. Once you have selected it then the Elementor Panel will display the Widget options that let you change what content the widget displays as well as how the content displays (styles) such as colour or text size. If you need help with the widget click the Need Help? button that is located at the bottom of the Widget settings panel.

For some more information on common widgets refer to Text Widget, Image Widget, Video and Button Widget pages. You can view a complete list of available widgets and how they work on Elementor website.
Preview & Publish your page
After you’re done designing your page, Preview & Publish it.
Go to the bottom panel:
- To preview click the icon.
Note: The Preview link is different than the actual page link
- If you are satisfied with the result, go ahead and click the button.
- Click ‘Have a Look‘ to view the published page

Save Draft
In Elementor you can edit a Published page and save your work as Draft. That means that you will not ruin your published page while saving your work as Draft.
- Click the arrow next to Update / Publish
- Choose Save Draft
