Your website uses a custom content type called Case Studies that allows you to easily add new projects to the website.
Add new Case Study
- Login to your WordPress Admin
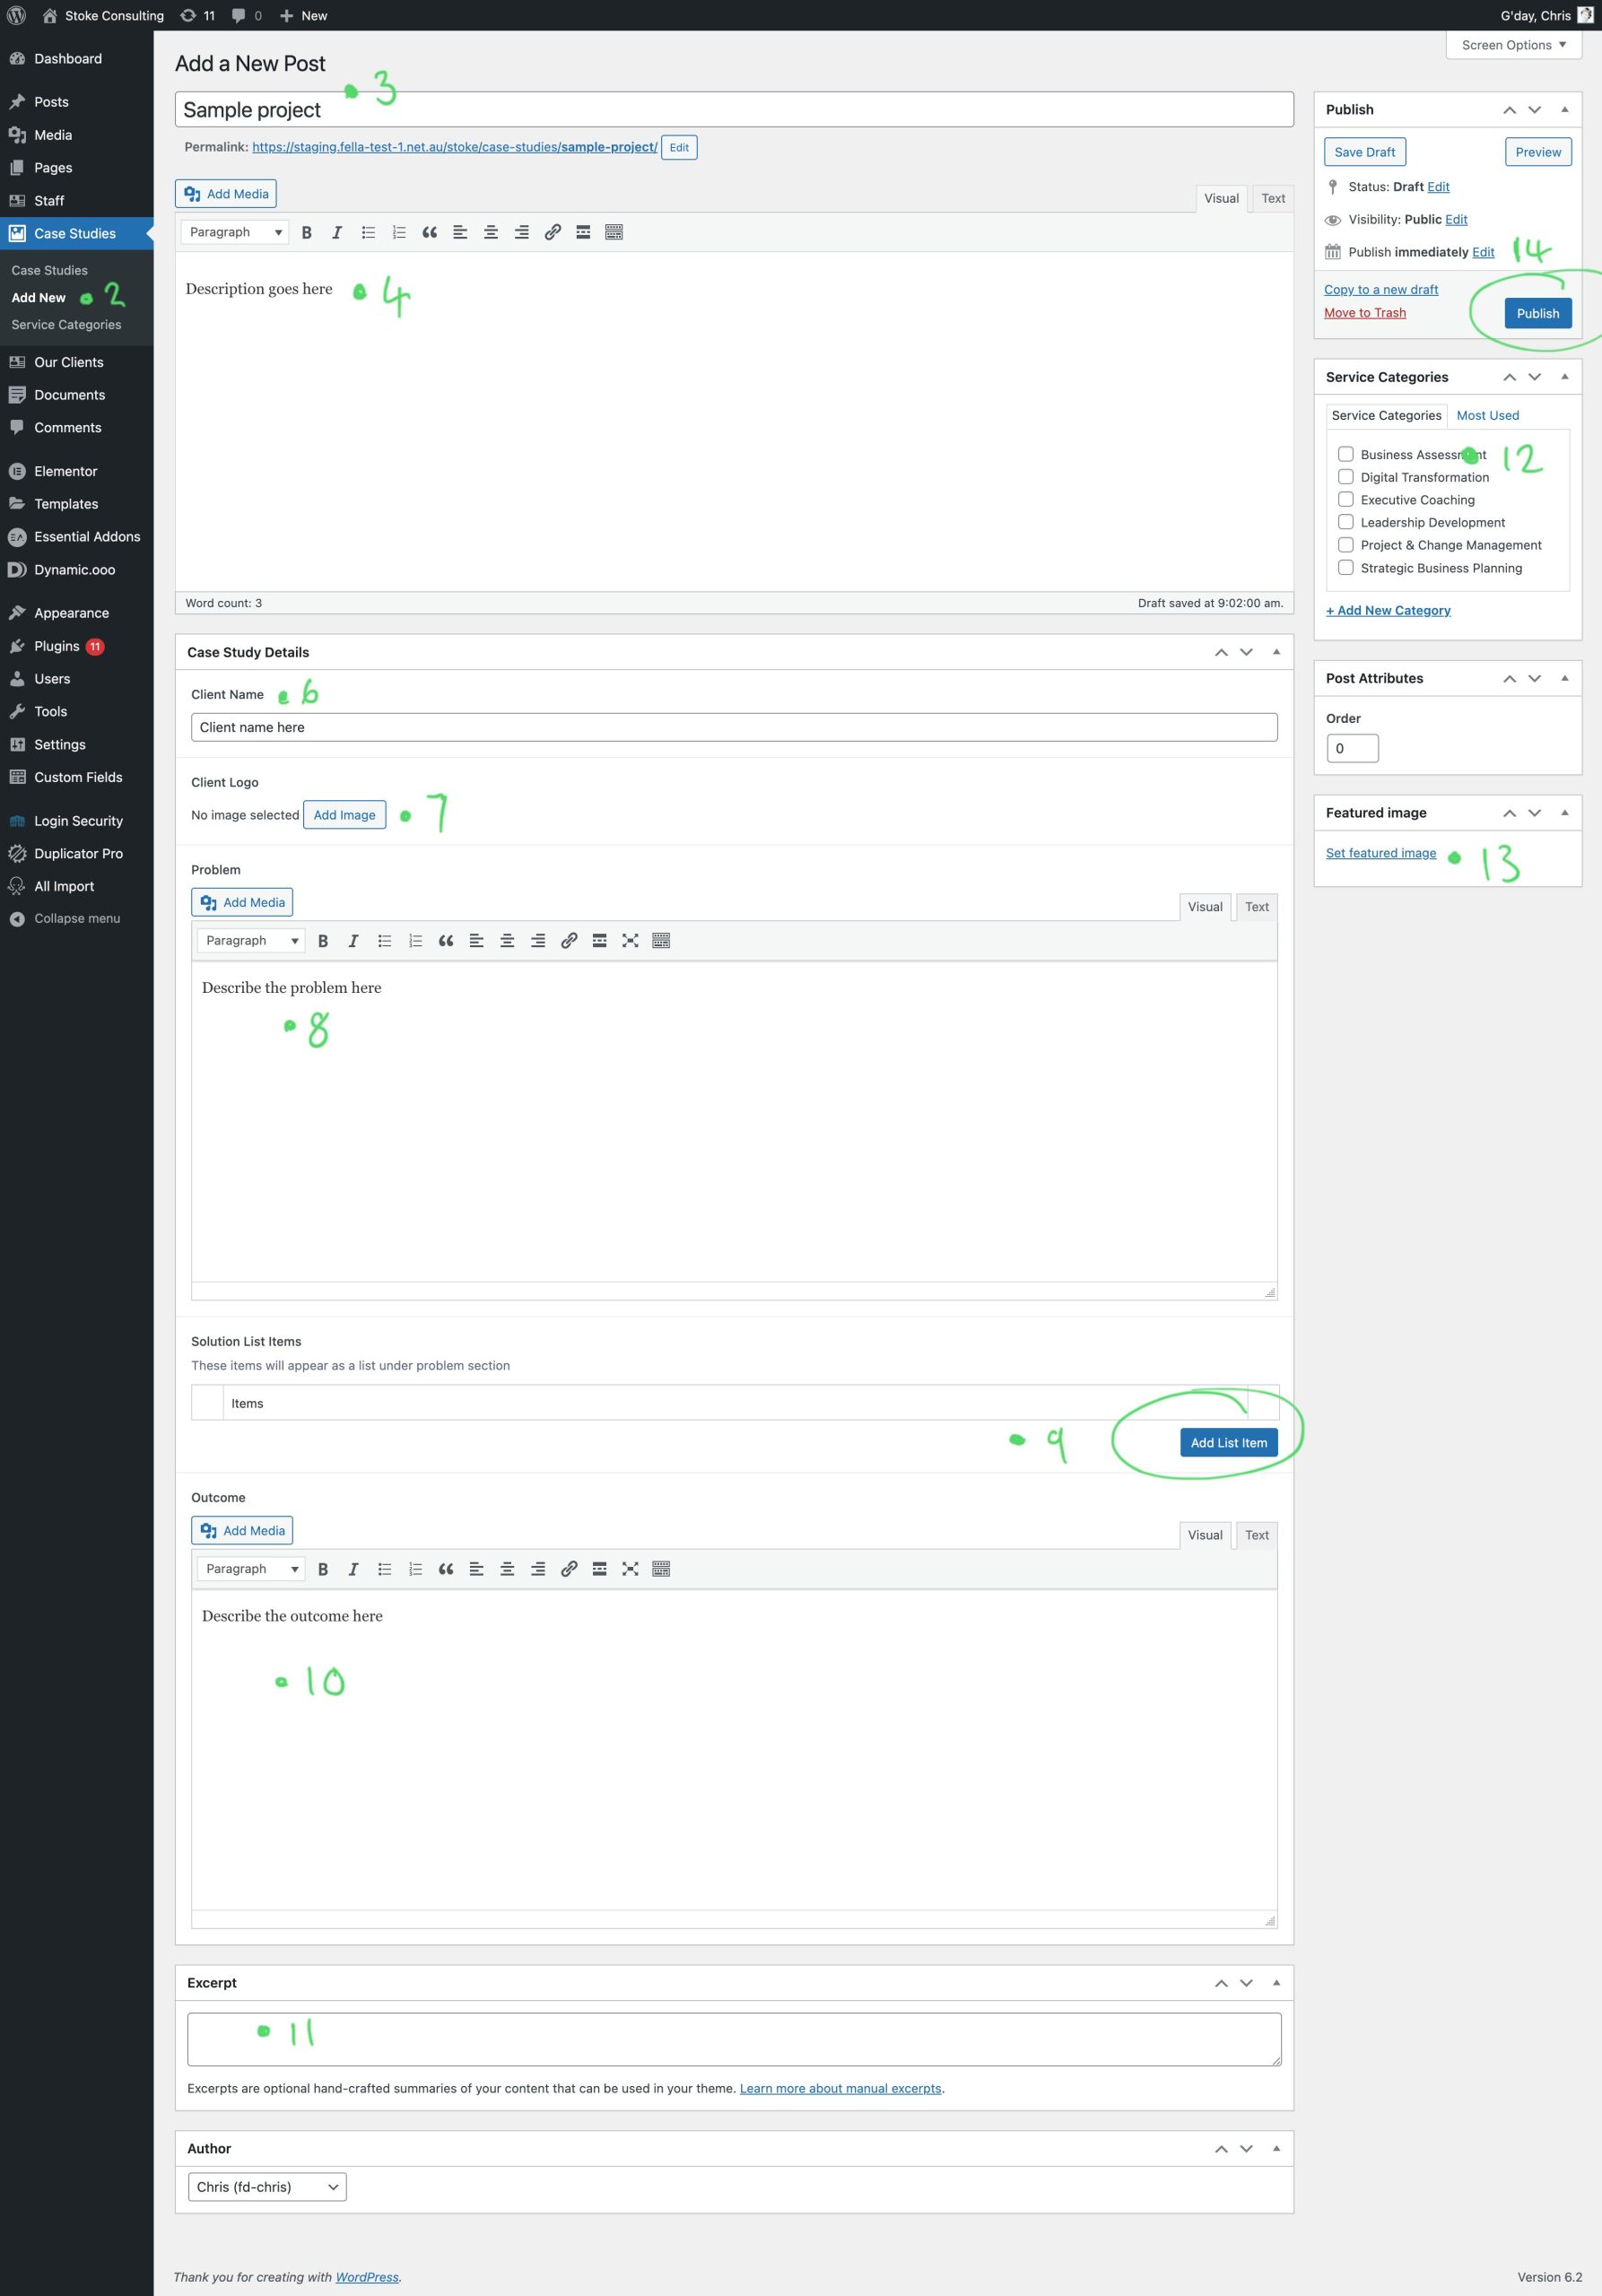
- Go to Case Studies > Add New in the WordPress menu
- Give the project a title
- Add project description in the text editor
- Next add the project details under the Case Studies Section. All information in this section is optional.
- Add the Client name
- Client Logo: click Add Image to upload their logo
- Problem: Add text to describe the problem in the text editor
- Solutions: Will appear as a list on the website. Add add list items simply click the Add List Item button then describe the item. Click Add List Item button to add as many items as required.
- Outcome: Add text to describe the clients outcomes in the text editor.
- Excerpt: This is used on the Case Study page where all case studies are listed. It is used as the summary description and is optional. If you don’t add anything an excerpt will be created using the main description.
- Category: Categories are used as the Case Study filters. On the right side of the page under Service Categories you can assign Categories to the project. Projects can be added to multiple categories.
- Feature image: This is used as the main image on the case study detail page as well as in the list. Click Set feature image to upload or select an image from your media library.
- Click the Publish button to save your changes and make the project live.
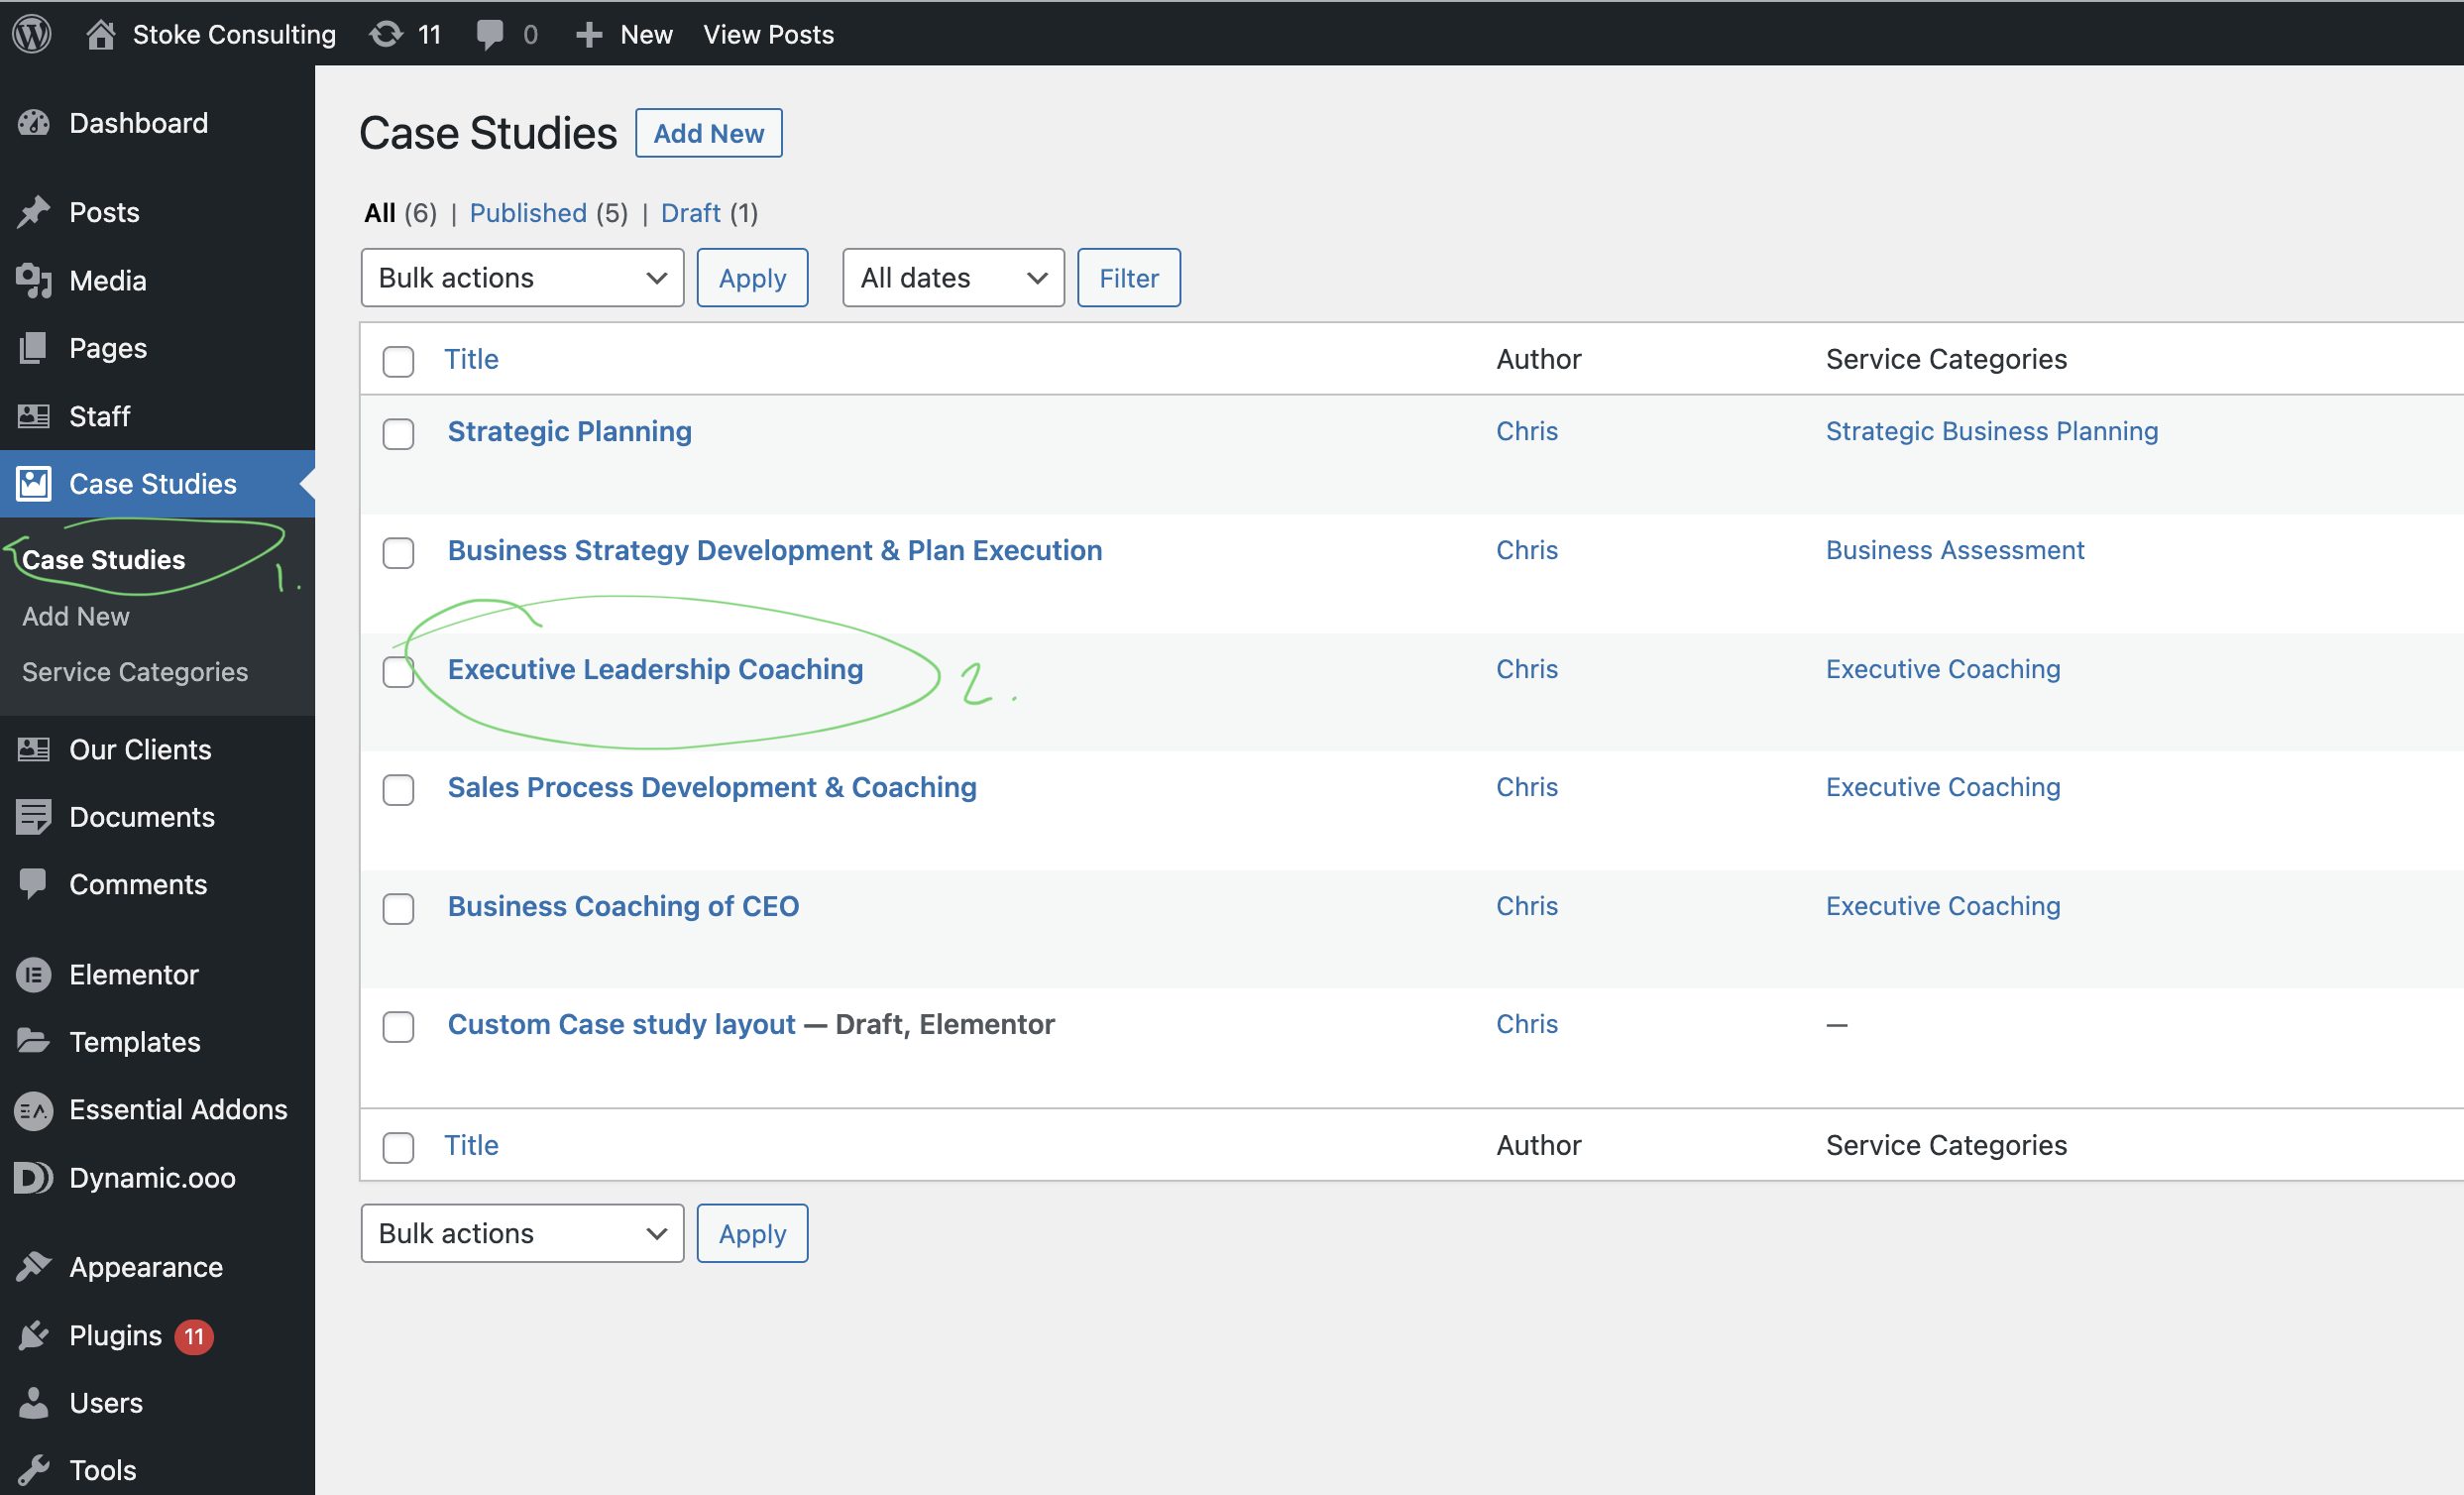
Edit existing Case Study
- Login to your WordPress Admin
- Click Case Studies in the WordPress Menu
- This will display a list of projects. Simply click on the project title to edit it.
- Make changes as required then click the Update button to save and apply the changes.